> ## Documentation Index
> Fetch the complete documentation index at: https://quester.mintlify.site/llms.txt
> Use this file to discover all available pages before exploring further.
# The model canvas
> Building an argument you can defend: concepts bound to sources, evidence assessed, a defence rehearsed.
The canvas is where a model gets built, and it does one thing most diagramming tools do not, which is connect the picture to your literature. You can bind a concept to the sources that support it, assess a relationship against what those sources actually say, and let your advisor read the whole thing and tell you what is missing. Then, when you think it is finished, you can rehearse defending it claim by claim against the questions a committee would ask. The diagram is the visible part, while the argument underneath it is what you are really building.
 ## Concepts and relationships
Two kinds of thing live on the canvas.
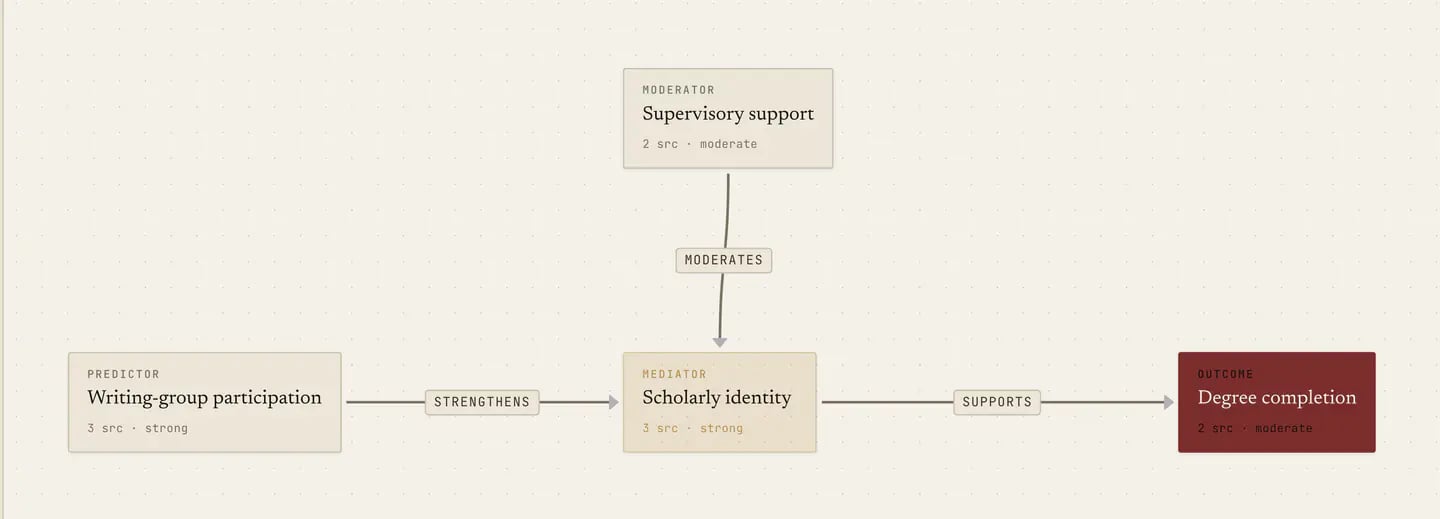
**Concepts** are the boxes, meaning the constructs, variables, themes or claims your model is made of, and you should name each one properly, since an unnamed concept is just a shape.
**Relationships** are the arrows between them, and every arrow carries a claim, which is why you can type one **Supports** or **Contradicts** and label it with what the relationship actually is. This is where a diagram stops being a picture, because "A → B" says nothing whereas "A → B (supports: increases uptake, mediated by trust)" is a claim someone can dispute.
Plain shapes such as rectangles, circles and ellipses handle grouping and annotation, with the usual styling underneath for colour, border, opacity, text alignment and layering, while grid and snap-to-grid sit in the toolbar and you can export the canvas as an image on a background of your choosing.
## SEM notation
If you are drawing a path or structural equation model, the canvas follows the conventions your reader already knows, taken from Kline's *Principles and Practice of Structural Equation Modeling*.
**Measurement**, in the concept inspector, decides the shape. **Observed** is a rectangle, meaning something you measured directly, and it is what every concept starts as. **Latent** is an ellipse, meaning a construct you infer rather than measure. Nothing you have already drawn changes, since a concept with no measurement set reads as observed.
**Add error term** puts a small circle beside a variable with a single-headed arrow running into it, which is the disturbance, standing for the variance your model leaves unexplained. It is only offered on endogenous variables, meaning ones something else in the model points into, because a variable nothing predicts has nothing left unexplained, and each variable gets one. Delete the variable and its error term goes with it. Draw a line between two error terms and you get a correlated-errors arc, double-headed, as the convention wants.
**Covariances are double-headed.** Any relationship you type **correlates with** is drawn with an arrowhead at both ends, since a non-directional claim should not point one way, and the start-arrow control is set for you on those arrows.
One thing the canvas deliberately leaves to you is the direction of your indicator arrows. A reflective model points from the construct out to its indicators while a formative one points inward, both are legitimate, and which you mean is your claim to make rather than ours to correct.
## Binding concepts to sources
Select a concept and use the inspector to bind sources to it from your library, with search.
## Concepts and relationships
Two kinds of thing live on the canvas.
**Concepts** are the boxes, meaning the constructs, variables, themes or claims your model is made of, and you should name each one properly, since an unnamed concept is just a shape.
**Relationships** are the arrows between them, and every arrow carries a claim, which is why you can type one **Supports** or **Contradicts** and label it with what the relationship actually is. This is where a diagram stops being a picture, because "A → B" says nothing whereas "A → B (supports: increases uptake, mediated by trust)" is a claim someone can dispute.
Plain shapes such as rectangles, circles and ellipses handle grouping and annotation, with the usual styling underneath for colour, border, opacity, text alignment and layering, while grid and snap-to-grid sit in the toolbar and you can export the canvas as an image on a background of your choosing.
## SEM notation
If you are drawing a path or structural equation model, the canvas follows the conventions your reader already knows, taken from Kline's *Principles and Practice of Structural Equation Modeling*.
**Measurement**, in the concept inspector, decides the shape. **Observed** is a rectangle, meaning something you measured directly, and it is what every concept starts as. **Latent** is an ellipse, meaning a construct you infer rather than measure. Nothing you have already drawn changes, since a concept with no measurement set reads as observed.
**Add error term** puts a small circle beside a variable with a single-headed arrow running into it, which is the disturbance, standing for the variance your model leaves unexplained. It is only offered on endogenous variables, meaning ones something else in the model points into, because a variable nothing predicts has nothing left unexplained, and each variable gets one. Delete the variable and its error term goes with it. Draw a line between two error terms and you get a correlated-errors arc, double-headed, as the convention wants.
**Covariances are double-headed.** Any relationship you type **correlates with** is drawn with an arrowhead at both ends, since a non-directional claim should not point one way, and the start-arrow control is set for you on those arrows.
One thing the canvas deliberately leaves to you is the direction of your indicator arrows. A reflective model points from the construct out to its indicators while a formative one points inward, both are legitimate, and which you mean is your claim to make rather than ours to correct.
## Binding concepts to sources
Select a concept and use the inspector to bind sources to it from your library, with search.
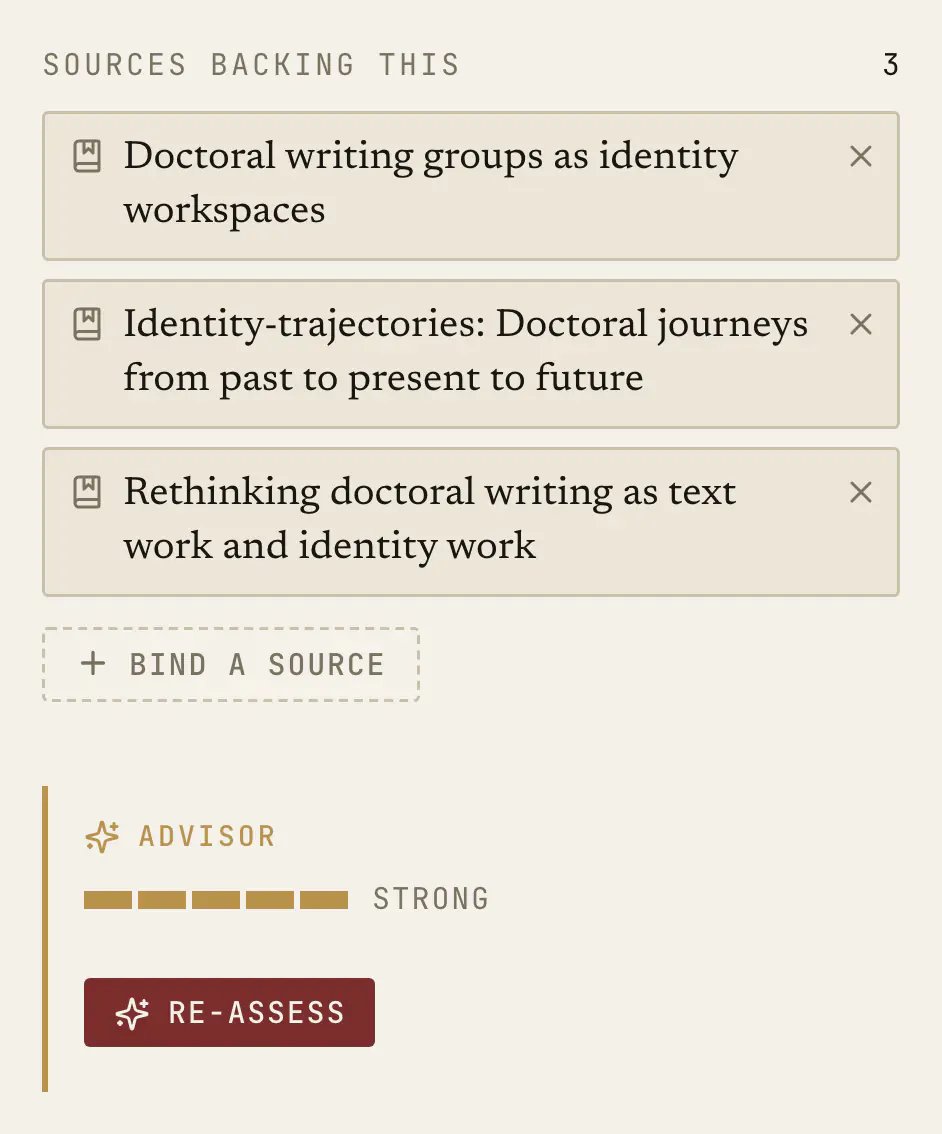 This is what makes the canvas worth the time, because a bound concept carries its own evidence, letting you see at a glance which parts of your framework rest on twelve papers and which rest on one you half-remember. By the time you write the chapter, the citations are already attached to the claims they support.
The inspector also shows **Linked notes**, meaning your own writing on those bound sources, so the reasoning behind a box sits one click from the box.
## Assessing evidence
**Assess evidence** on a concept, or **Assess relationship** on an arrow, asks your advisor to read the bound sources and report what they actually support.
On a relationship this earns its keep, since it reads the literature behind both ends and tells you whether the claimed link is supported, contradicted or simply never addressed. "Not addressed" comes back most often and matters most, because an unexamined arrow in a framework is where a viva goes wrong.
**Compare with the literature** measures a concept against the corpus more broadly, and **Re-assess** runs again after you change the bindings.
## What's missing?
The synthesis bar reads the whole model instead of one piece of it, so **Synthesize** gives you your advisor's reading while **What's missing? →** asks the harder question directly.
Typical answers include a construct everyone in your field includes and you left out, a moderator your sources keep mentioning that has no arrow, or a relationship you have drawn as causal where your literature only establishes correlation.
## Start with an objective
The models page is where you start an AI-assisted model. Describe what you are trying to establish, add the variables or concepts you already have, and optionally choose a research question or a source to ground the draft. The advisor chooses a structure that fits the need and creates editable nodes and relationships on the canvas.
The result is a starting argument, not a finished claim: rename concepts, change their roles, bind them to sources, and decide which relationships survive your reading.
## Stress-test: the oral defence
The most useful thing on this page, walking your model one claim at a time and asking what a sceptical committee would ask about each.
Every claim ends up marked **Defensible** or **Undefended**, you move through with **Next claim** and **Previous claim**, **End stress-test** stops it, and **Re-run** goes again once you have made changes.
An undefended claim is not a failure so much as a reading list, handed to you a year before your defence instead of during it, which is why this is worth running before any committee meeting.
## Versions, history, and compare
Every model keeps a version history, so you can save a version, label it if you like, and have it stay, while restoring an earlier one snapshots the current state first so restoring can never cost you work.
**Compare** puts the current canvas beside any saved version of this model, or beside another model in the project, and the comparison is structural, matching concepts and claims by identity while ignoring position, because moving a box does not change an argument. When nothing has changed it tells you so, with *"Structurally identical - same concepts, same claims."*
The obvious use is watching how your framework moved between your proposal and now, though the better one is comparing your model against a rival's, reconstructed from an objective and an optional grounding source, and reading the structural difference as a list of what you are actually contributing.
## Working practice
Sketch fast and roughly, then bind sources to every concept. Assess the relationships and expect several to come back unsupported, which is the tool doing its job, then run the stress-test and keep the undefended list as a reading queue. Save a labelled version before any significant revision, and compare afterwards.
Next: [The PRISMA 2020 flow](/manual/prisma-flow).
This is what makes the canvas worth the time, because a bound concept carries its own evidence, letting you see at a glance which parts of your framework rest on twelve papers and which rest on one you half-remember. By the time you write the chapter, the citations are already attached to the claims they support.
The inspector also shows **Linked notes**, meaning your own writing on those bound sources, so the reasoning behind a box sits one click from the box.
## Assessing evidence
**Assess evidence** on a concept, or **Assess relationship** on an arrow, asks your advisor to read the bound sources and report what they actually support.
On a relationship this earns its keep, since it reads the literature behind both ends and tells you whether the claimed link is supported, contradicted or simply never addressed. "Not addressed" comes back most often and matters most, because an unexamined arrow in a framework is where a viva goes wrong.
**Compare with the literature** measures a concept against the corpus more broadly, and **Re-assess** runs again after you change the bindings.
## What's missing?
The synthesis bar reads the whole model instead of one piece of it, so **Synthesize** gives you your advisor's reading while **What's missing? →** asks the harder question directly.
Typical answers include a construct everyone in your field includes and you left out, a moderator your sources keep mentioning that has no arrow, or a relationship you have drawn as causal where your literature only establishes correlation.
## Start with an objective
The models page is where you start an AI-assisted model. Describe what you are trying to establish, add the variables or concepts you already have, and optionally choose a research question or a source to ground the draft. The advisor chooses a structure that fits the need and creates editable nodes and relationships on the canvas.
The result is a starting argument, not a finished claim: rename concepts, change their roles, bind them to sources, and decide which relationships survive your reading.
## Stress-test: the oral defence
The most useful thing on this page, walking your model one claim at a time and asking what a sceptical committee would ask about each.
Every claim ends up marked **Defensible** or **Undefended**, you move through with **Next claim** and **Previous claim**, **End stress-test** stops it, and **Re-run** goes again once you have made changes.
An undefended claim is not a failure so much as a reading list, handed to you a year before your defence instead of during it, which is why this is worth running before any committee meeting.
## Versions, history, and compare
Every model keeps a version history, so you can save a version, label it if you like, and have it stay, while restoring an earlier one snapshots the current state first so restoring can never cost you work.
**Compare** puts the current canvas beside any saved version of this model, or beside another model in the project, and the comparison is structural, matching concepts and claims by identity while ignoring position, because moving a box does not change an argument. When nothing has changed it tells you so, with *"Structurally identical - same concepts, same claims."*
The obvious use is watching how your framework moved between your proposal and now, though the better one is comparing your model against a rival's, reconstructed from an objective and an optional grounding source, and reading the structural difference as a list of what you are actually contributing.
## Working practice
Sketch fast and roughly, then bind sources to every concept. Assess the relationships and expect several to come back unsupported, which is the tool doing its job, then run the stress-test and keep the undefended list as a reading queue. Save a labelled version before any significant revision, and compare afterwards.
Next: [The PRISMA 2020 flow](/manual/prisma-flow).